Wednesday, March 23, 2011

Ash and Giovanna's Garden Shed: Ready for Cob!

Dylan and I started the morning off by building some steps:


Next, we installed wire fencing around the entire structure. It is attached to the firring strips (the vertical, skinny pieces of lumber), and so is being held about 1 inch away from the plywood sheathing. This system is ugly to look at, but is a perfect setup for adhering a 2-inch-thick layer of cob around the outside of the building.


Here are some photos of the my own shed, which utilizes the same technique...

Firring strips + fencing:


With cob:


Ash and Giovanna's shed now looks like this:


Ready for cob and then earthen plaster!

Tuesday, March 22, 2011

Ash and Giovanna's Garden Shed: Almost Done!

It's been a couple of weeks since we have posted on the progress of Ash and Giovanna's shed.  We have been out twice since our last post.  The roof is on, the plywood sheathing is up, the window and door are in and Danielle installed the dry stack stone piers at the mid-point of the structure.  The remaining punch list includes steps, exterior fencing (which will give a good surface area to attach the cob to that Ash and Giovanna plan to apply to the exterior) and some odds and ends.

 Danielle's stone pier below the window


Greg installing the PT 1'x6" door jamb.
To his right is one of the doors we got when Peter's Design Works closed.


The roof hasn't been easy. Securing in sections (not waiting until the end) is the key to tin roofing!


The three sided outdoor section.  And already in use!


 Greg installing window trim.  With the walls up and window in the interior feels just right.  Instead of being deep (6') it is wide (10') putting everything within two steps of the door.  When it comes to sheds, access and convenience are key and we think this one does just that.


Cutting the 15 lite door down to size.  It was probably once in the parlor of a historic Durham home, now it will add some flare to the shed and spend its days looking out on Ash and Giovanna's beautiful garden.


  Shocker!  We finished in the dark on the roof!


Next post should wrap this project up!

Monday, March 7, 2011

Ash and Giovanna's Garden Shed (Build, Day Two)

Today we went out to Ash and Giovanna's property in the afternoon to continue work on the shed...


Here's one of the cedar posts that will be holding up the roof overhang over the front of the shed:


And here's the details of where the post meets the concrete pier. The square of lumber between the pier and the post is pressure-treated wood, to avoid having any future problems with moisture at that connection.


All four posts are up, and we've started to put the plywood up.


Some context, within which to appreciate the humbleness of a garden shed:


Filling the excavated holes back in around the piers.


We worked carefully to put up all of the roof rafters at night:


Next is installing the metal roofing, and continuing to sheath the outside in plywood.

Sunday, March 6, 2011

Ash and Giovanna's Garden Shed (Build, Day One)

We pre-casted 4 custom concrete piers in the back of my pickup truck, and drove them to site. The forms are built out of 3/4" OSB sheathing, and have a 9"x9" top, and a 15" by 15" base. This taper design transfers the weight from the building down onto a solid footing underground, and has a really nice look to it.


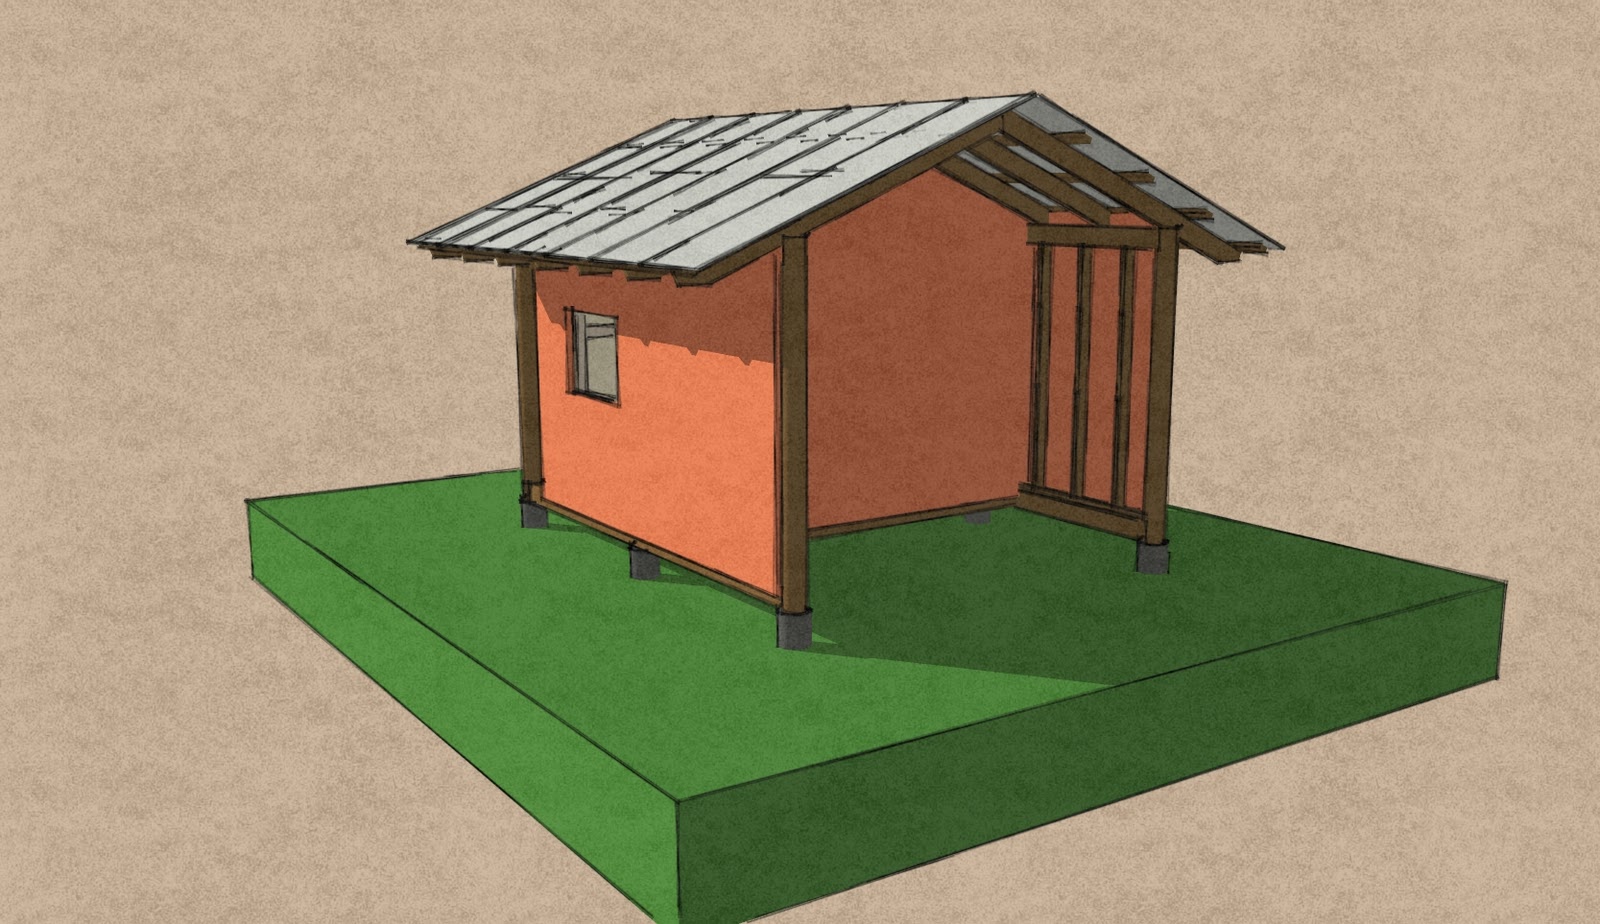
Here you can see the piers holding up a shed that I built for myself last October (in the photo the shed has a cob exterior layer, but not yet an orange earthen plaster).


We excavated the four holes (the most shallow of which is 12", and the deepest 22", as the ground is not level), and set the piers in place. It took a couple hours to get them all in, and leveled out with one another; it's worth the time to ensure that the rest of the build is level and square, and properly supported.


Next we installed the 12" boards that run from pier-to-pier, and the floor joists between them (with joist hangers).


With help from the family, we harvested a number of beautiful rocks from the riverbed down the hill. Ash picked them up in the tractor and transported them back uphill to dump them at the site. These will act as extra, dry-stacked piers under the runner boards, to cut the span from 12' to 6' (making the structure more sturdy, and putting less stress on the lumber).


I spent the morning cutting down two cedar trees into two 8-foot lengths each. Ash and Giovanna used our drawshaves to de-bark the roundwood to the aesthetic level that they liked. They preferred to leave some of the bark, especially around the knots, which I think is a gorgeous aesthetic. These will be the four corner posts.


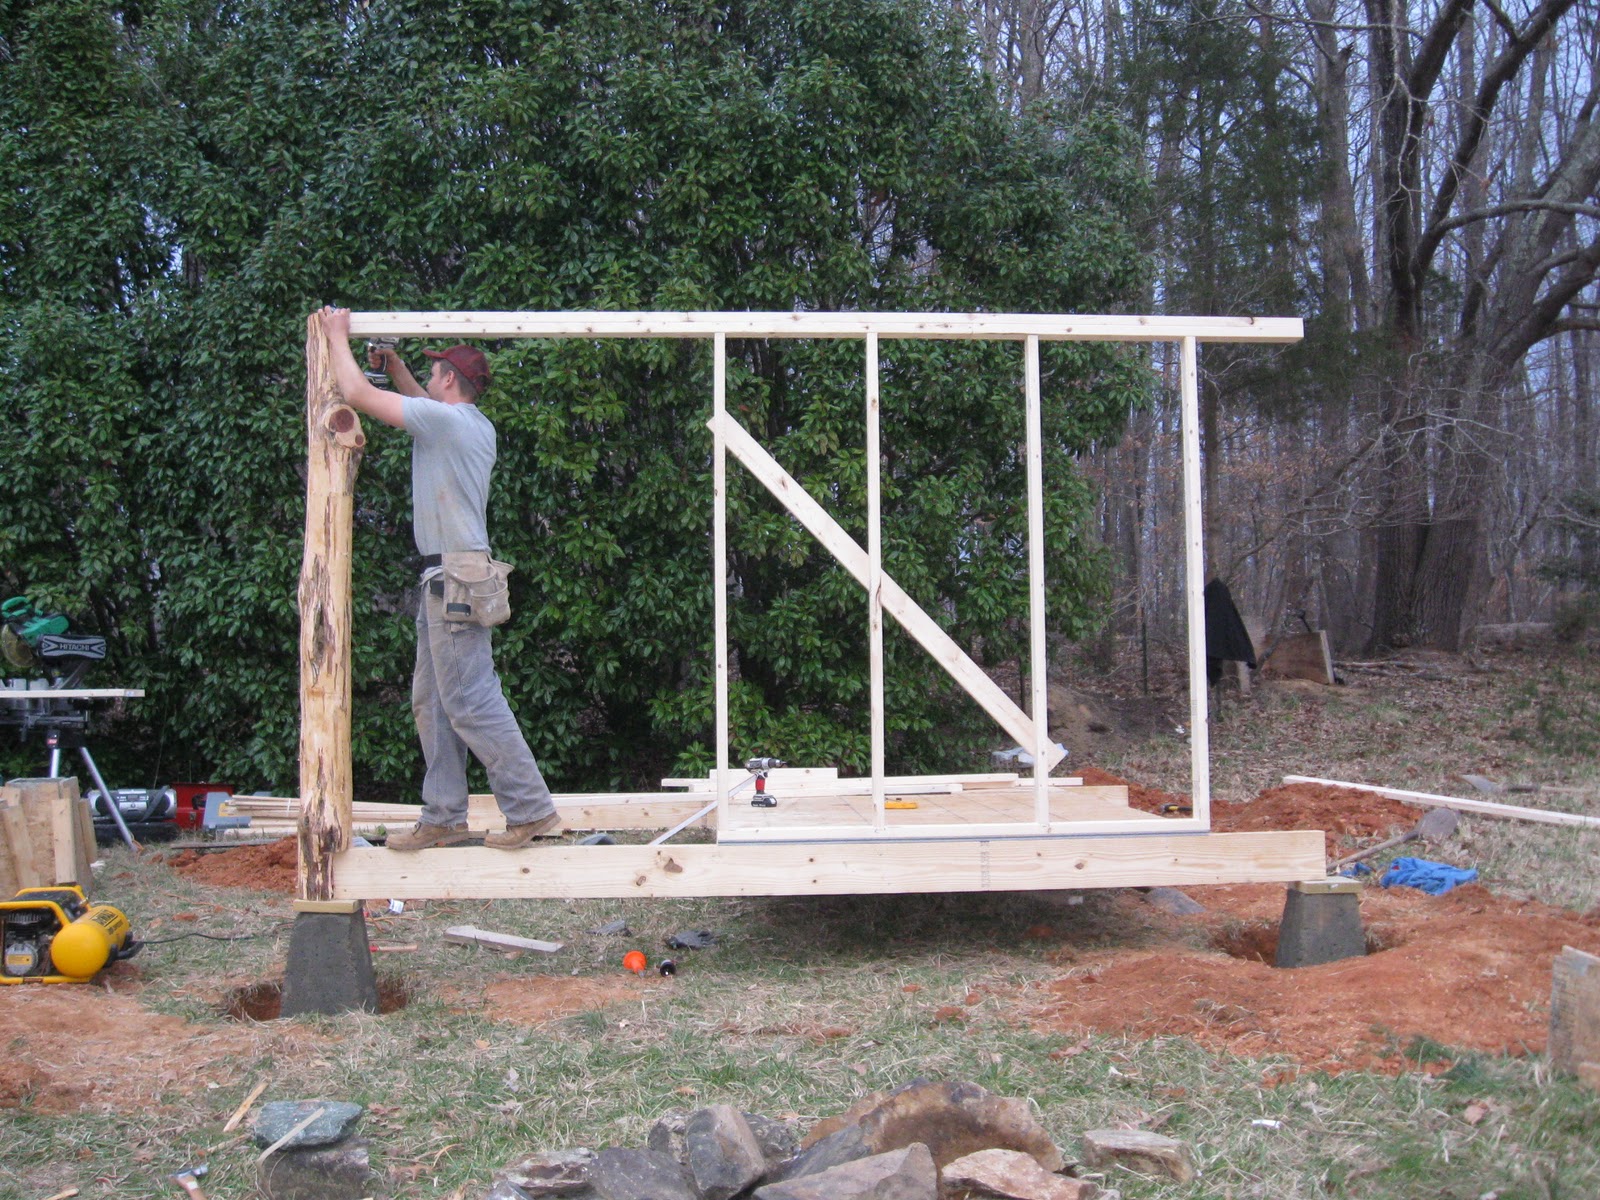
We framed out the South wall with dimensional lumber, and here is Dylan toe-screwing (driving a screw at a diagonal to connect two pieces of lumber) the connection between the top plate (the long piece above his head that connects the top of the studs) and the cedar post. Before sundown, we got the the West wall frame up, as well as the second post at the other end of this top plate. It was too dark to shoot a good photo at that point.


Today (Sunday) it is raining, and so we are not going back out to the site. But there will be more work and photos to come as soon as we get out there again sometime this week!

Ash and Giovanna's Garden Shed (design)

Ash and Giovanna requested a small shed structure with the following qualities:

1. ample enclosed storage space for hand tools
2. an extended roof to provide protected outdoor storage for wheelbarrow/lawnmower/strawbales/etc.
3. a window to let light into the building from the South side
4. the incorporation of some local, natural elements into the building to make it unique to the site/land

Below is a series of 4 jpeg images the show the basic design idea.

________________

The door underneath the gable leads into the enclosed tool storage space, which is a 6'X10' room with an 8-foot ceiling in the center, sloping down to 6'4" at the sides. The support structure is dimensional lumber, and the studs will be exposed inside to allow for very simple attachment of shelves, hooks, etc...


The opposite end from the door is the extended roof section of the shed. You can see that we plan to extend the two walls around this space, to enclose it more fully from driving rain (or snow), and to provide extra surface area to attach shelves/hooks to. The overhang is a little bit over 5 feet.


Here's the skeleton of the roof structure. It's a system of rafters and purlins, on top of which we will install galvanized metal roofing.


This is the basic post and floor joist layout for the building.